When it comes to organizing our blog posts into specific categories, Blogger offers a built-in feature called labels. This feature is designed to simplify the process of categorizing and arranging our content. Given the confusion surrounding Blogger Labels and their utilization, it's important to shed light on their potential and how they can benefit bloggers.
What are labels in Blogger?
Labels in Blogger are a built-in feature that allows bloggers to categorize and organize their blog posts. Labels serve as tags or keywords that bloggers can assign to their posts to indicate the topic or theme of the content. These labels help both the blogger and the readers in easily navigating and finding specific posts within a particular category.
When creating or editing a blog post in Blogger, bloggers can assign one or multiple labels to the post. For example, if a blog post is about a delicious cake recipe, the blogger can assign labels such as "recipes," "cakes," and "desserts" to indicate the content's subject matter.
When creating or editing a blog post in Blogger, bloggers can assign one or multiple labels to the post. For example, if a blog post is about a delicious cake recipe, the blogger can assign labels such as "recipes," "cakes," and "desserts" to indicate the content's subject matter.
How to use labels as header menu on Google Blogger
Creating label and adding to header menu has a significant role. This will enhance the user experience and make it easier for readers to navigate your blog and discover related content. Follow below step by step tutorial.
First phase adding Labels to Your Blogger Post Titles
1. Open your web browser and go to the blogger dashboard.
2. Click on the "Posts" link to proceed.
3. Locate the post you want to edit and click on its title. By clicking on the title, you will be directed to the post editor, where you can make changes to the content, title, labels, and other settings related to that specific post.
4. Within the sidebar, look for the "Labels" tab or link within the sidebar and click on it.
5. Type the desired category into the field. If you have multiple categories, you can separate them with commas. For example, if your categories are "Technology" and "Travel," you can enter them as "Technology, Travel" in the field.
6. Once you have entered the category names or labels, click on the "Done" button and click on orange button (publish).
Second phase locating the URL of Your Blogger Category/Label Page and add to menu header
Once you have created labels in Blogger, you can easily access and view the list of labels within the Blogger Posts area. This provides a convenient way to manage and organize your labels for effective categorization of your blog posts.
1. Go to your website and navigate to the section of your website where your labels or categories are displayed. This can vary depending on your website's design and layout. Look for the labels or categories either in the navigation menu, sidebar, or any other designated area where they are showcased. Click on the specific label or category that you want to explore.
2. Once you are on the label page that displays the posts associated with that label, look at the address bar of your web browser. The web address (URL) in the address bar represents the specific page you are currently viewing. Select and copy the entire web address (URL) from the address bar by highlighting it.
3. From the dashboard, navigate to the "Layout" option. It is typically located in the menu on the left-hand side of the screen. Click on the "Layout" option to enter the layout customization section. In the layout customization section, you will see a visual representation of your blog's layout with various sections, widgets, and elements.
Look for the section that represents your main menu or header menu. It is usually located near the top of the layout. Click on the main menu or header menu section to access its settings and customization options.
4. By clicking on the main menu or header menu section within the layout customization, you can modify the menu items, add or remove labels or categories from the menu, rearrange the order of menu items, and make other changes related to your blog's navigation menu.
5. Click on the "Add new item" option within the Main Menu or Header Menu widget.
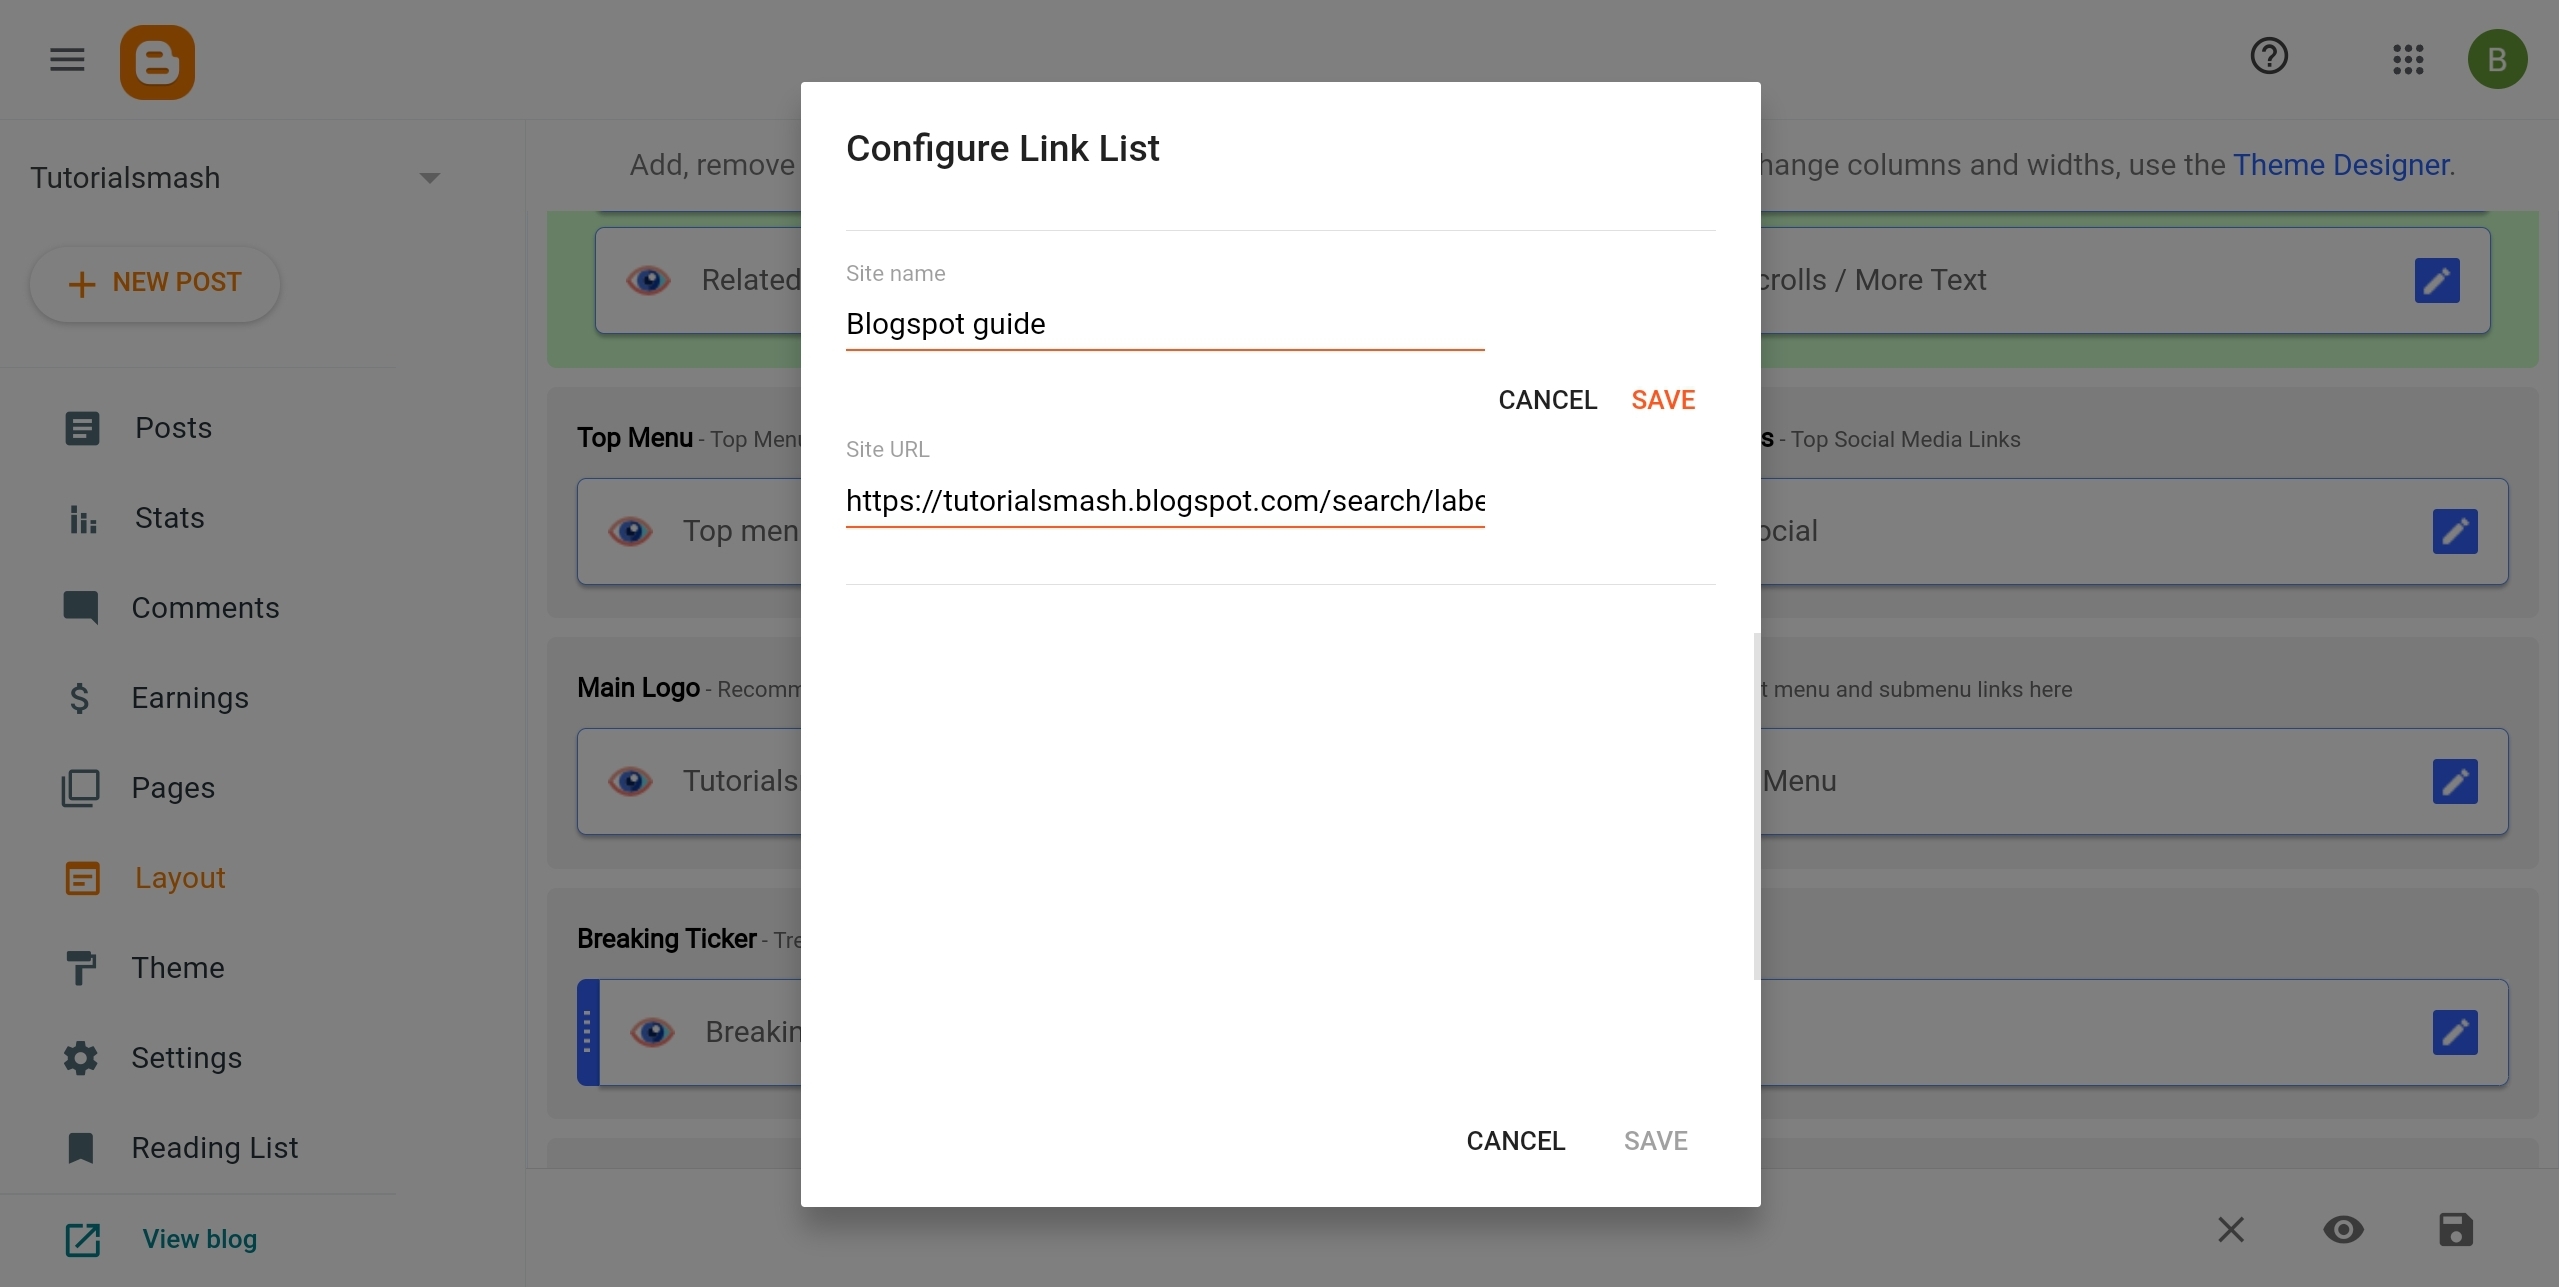
6. In the "Site Name" field, enter the label or category name you want to add as a menu item. In the "Site URL" field, enter the URL or web address of the label's page or category archive. This will be the page where all posts with that label are displayed. Save the changes to update the menu.
I'm glad you found the tutorial helpful! In addition to the steps provided, there are several other features and options available in Blogger that you can explore to enhance your blogging experience. If you have any specific questions or need assistance with any aspect of blogging or using the Blogger platform, feel free to ask. Happy blogging!


